Insert the Intel CD in your CD-ROM drive.
Use Windows* Explorer to find and launch PktPt\NT4\Cert\setup.exe.
The installation welcome screen appears.
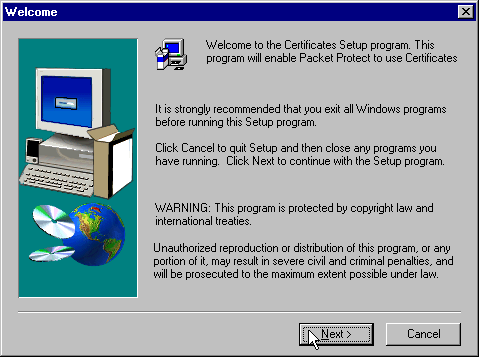
Click Next and read the license agreement.
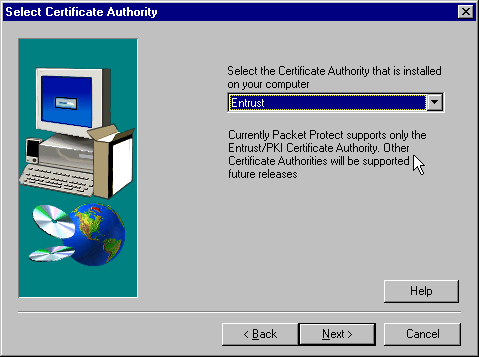
Click Next. The Select Certificate Authority window
appears. Entrust is pre-selected for you.
Click Next. The Set Up Certificate window appears.
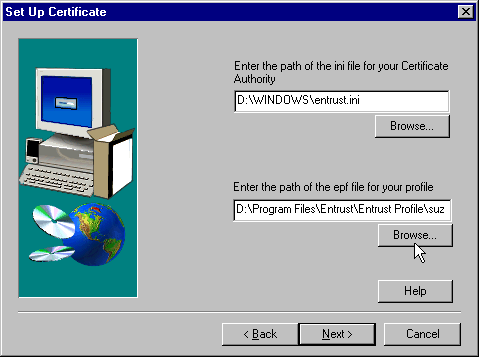
The setup program locates the Entrust .ini file. If your
Entrust administrator wants you to use another .ini file, use the Browse
button to locate that file.
The setup program also locates the profile that you created when you
installed Entrust/Entelligence on your system. (Entrust profiles have an .epf
extension.). If your Entrust administrator wants you to use another .epf
file, use the Browse button to locate that file.
Click Next. The setup program installs files and configures Intel Packet
Protect to use certificates. Be patient, as this may take up to a minute to
complete the installation. You will then be asked to log on to Entrust.
When the installation is complete, you will see this
message indicating that the installation was successful.
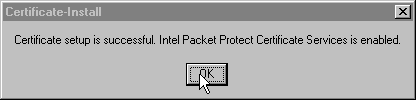
Click OK.